 Kailey Strachan for E! Online
Taylor Swift, Allison Williams and Katy Perry have all at one time or another used their blush to make a statement. But in the case of a no makeup/makeup beauty aesthetic, the statement is simply how natural you can make it.
When most people blush naturally, it looks as if a rosy hue effortlessly emerged from a single point on the apple of the cheek. It expands in all directions and then gradually fades.
You would think this scenario is easy enough to mimic with the right color and brush, but so many people get it oh-so wrong.
When you look at makeup on a base level, it's all about highlight, contour and color. Highlight is used to play up and accentuate features, while contour helps to recede features that we're trying to minimalize. Color rounds an area.
Contour goes into the hollows of your cheeks under the cheekbones, highlight goes directly on the cheekbones and blush color goes on the apple of the cheek to "lift" the face. When you put the blush in either of the other two turfs, you can end up looking either swollen or unnatural.
So where the heck is this elusive apple that has people running around looking like they're Cyndi Lauper circa "Girls Just Want to Have Fun"?
Some people say smiling helps to find the apple of the cheek, but when you stop smiling your blush might look too low. People with resting bitch face deserve good blush too!
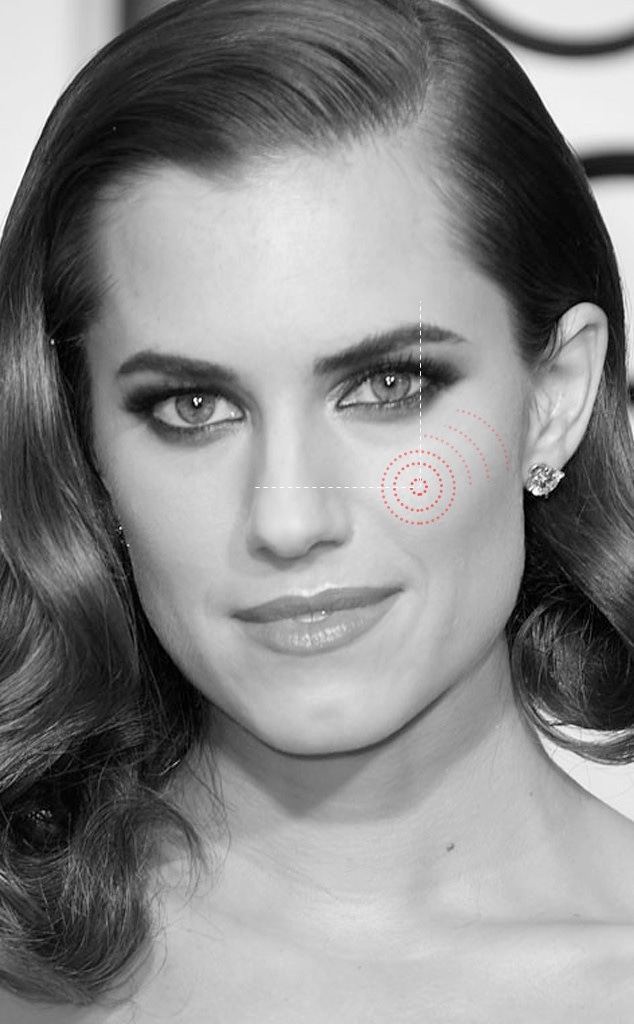
The best way to find your sweet blush spot is to take your right-hand pointer finger and vertically line it up just after your iris. Then take your left-hand pointer finger and hold it horizontally in front and slightly above the ball of your nose, so it looks like you're making an "L." That's your blush point.
For one second you might look like a Raggedy Ann doll, but tap out any excess color from your brush and start the blending process.
Think of the blending blush like a little ball of dough. Your goal is to roll out the edges until they blend with the surface underneath it. The more blush you use, the bigger the ball of dough, the more likely you are to look like blush took over your face. You can always go back for seconds.
Move the blush away from the nose but keep the most saturated point of color on the blush spot. Yes, you're going to have to blend that blush slightly out in between the contour and highlight areas of the cheekbones but you don't want to be able to see a Nike swoosh. If you can see any lines, your blush is not completely blended.
Continue tapping out your brush if you feel that there's still too much color and repeat the process until you have your desired level of color.